

Lorex Security Camera Installation Miami Beach Coral Gables
How to install Lorex security cameras Miami Beach Coral GablesInstalling Lorex security cameras Miami Beach Coral Gables is easy with Lorex. World leaders in Do-It-Yourself Lorex security cameras Miami Beach Coral Gables, our intuitive products are designed with customers in mind. Lorex security camera installation Miami Beach Coral Gables. Lorex Security Camera Installation Miami Beach Coral Gables
Lorex Security Camera Installation Miami Beach Coral Gables
They feature simplified installation processes that save both time and money. With that said, there are still a few important questions that need to be answered before installation can begin. Lorex security camera installation Miami Beach Coral Gables
What do I need to install Lorex security cameras Miami Beach Coral Gables?
A security system from Lorex includes everything you need to get your system up and running right out of the box. Each camera (whether sold separately or as part of a system) includes the necessary parts to connect and mount your cameras. Lorex security camera installation Miami Beach Coral Gables
Each camera typically includes:
60ft of cable (either BNC or Cat5e – per camera)
The mounting kit (screws and anchors)
A power adapter and/or receiver
Common household tools, such as drills and screwdrivers are also typically required for installation of Lorex security cameras Miami Beach Coral Gables, or for making final adjustments and positioning. Lorex security camera installation Miami Beach Coral Gables
Where should I install my Lorex security cameras Miami Beach Coral Gables?
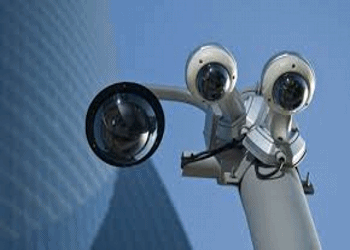
Outdoor Lorex security cameras Miami Beach Coral Gables from Lorex by FLIR are waterproof, meaning you can install them where you need them most. Lorex security camera installation Miami Beach Coral Gables Once you have determined the areas that need the most coverage, optimize installation locations with the following tips:
Install Lorex security cameras Miami Beach Coral Gables up-high on ceilings or walls
Place cameras up high
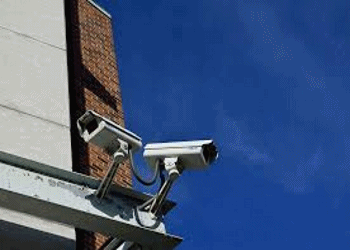
This will protect cameras from vandalism and provide a wider coverage area. Try to install Lorex security cameras Miami Beach Coral Gables under shelter to keep it safe from rain and dust. Lorex security camera installation Miami Beach Coral Gables
Lorex Security Camera Installation Miami Beach Coral Gables
Keep under shelter
This will reduce the impact precipitation has on the quality of security footage. Point monitoring cameras away from the sun or direct light sources; Lorex security camera installation Miami Beach Coral Gables
Point away from light
Mount the camera so the lens is pointed away from sources of light. Avoid trees or foliage to maximize home security footage; Lorex security camera installation Miami Beach Coral Gables
Obstruction-free
Don’t make obstructions the point of focus to maximize the field of view. Try to conceal all video and power cables for your home monitoring cameras; Lorex security camera installation Miami Beach Coral Gables
Protect camera cables.
Install on the side of buildings, soffits or ceilings to conceal the cables. Keep home cameras in obvious locations to deter intruders and thieves; Lorex security camera installation Miami Beach Coral Gables
Obvious placement
The mere appearance of Lorex security cameras Miami Beach Coral Gables can deter potential intruders; Lorex security camera installation Miami Beach Coral Gables
All Lorex security cameras Miami Beach Coral Gables come with Quick Start Guides that document how to install them, along with tips and other guidelines. For more on security camera installation and ideas please see our guide on security camera planning and positioning. Lorex security camera installation Miami Beach Coral Gables
How to Install Lorex security cameras Miami Beach Coral Gables
If you’re looking for information about Lorex Security Camera Installation, you’ve come to the right place. We’re going to point you in the right direction for some help with installing Lorex security cameras Miami Beach Coral Gables.
But first of all, if you’re looking to buy a Lorex Camera, the place you’ll need to look is here: www.spyworldmiami.com. Lorex security camera installation Miami Beach Coral Gables
Are Lorex security cameras Miami Beach Coral Gables Hard to Install?
If you’re a handyman or handywoman that’s decent with technology, it won’t be hard for you at all. Get out your drill, make a few holes, put those cameras up and hook up the wires. Then set up the computer end of things. Lorex security camera installation Miami Beach Coral Gables
Your Lorex security system will be up and running in no time. If you consider yourself moderately handy, then with a bit of help, reading the instructions or watching recommend videos/tech support, you should be able to do it easily enough; Lorex security camera installation Miami Beach Coral Gables
Lorex says that they design their Lorex security cameras Miami Beach Coral Gables to be DIY friendly. Many people are able to get Lorex home Lorex security cameras Miami Beach Coral Gables up and running in only a couple of hours. Lorex security camera installation Miami Beach Coral Gables
However, maybe you’re not that handy, nor are you good at computer stuff. In this case, you’ll likely find it very difficult. In this case, we recommend hiring a company to help you. Lorex security camera installation Miami Beach Coral Gables
What Tools do I Need to Install Lorex security cameras Miami Beach Coral Gables?
The most basic thing you’ll need to install Lorex security cameras Miami Beach Coral Gables is a drill. The size and strength of the drill will depend on the exterior of your house. See this example where a guy installed Lorex security cameras Miami Beach Coral Gables on his brick walls. Lorex security camera installation Miami Beach Coral Gables
Installation at your house may be easier than this, depending on the material on your wall. If you need to buy a drill, go to a place like Home Depot. Ask what they recommend for your specific situation. You should also have a few screwdrivers handy during the installation process.
Where to Install Lorex security cameras Miami Beach Coral Gables?
Now that you’re ready to install your Lorex security cameras Miami Beach Coral Gables, you should consider the best places.
According to this blog, the best places to install surveillance cameras are:
Front door
Back door
Off-street windows
Backyard or side gate
Basement stairs
The Lorex website recommends keeping the following things in mind when installing your Lorex security cameras Miami Beach Coral Gables. They should be placed in:
High places, under shelter
Pointing away from lights
In obvious places
Where cables can be hidden
How to Install Lorex security cameras Miami Beach Coral Gables
How do you actually go about installing Lorex security cameras Miami Beach Coral Gables? The good news is that the instruction manual that comes along with your system is quite good. It’s complete with step by step instructions and lots of pictures
How to Install a Security Camera System for a House
The idea of drilling holes through the walls of your house to run video and power cables for a security camera system might seem daunting, but many Lorex security cameras Miami Beach Coral Gables come in all-included packages that make setting up your surveillance system a breeze. Read on for guidance on buying and installing your own home camera system.
Preparing Your Home
Make a diagram of your surveillance needs. It is both expensive and impractical to monitor every square inch of your house, so you need to prioritize what areas you want to watch the most.
Draw up a rough diagram of your house or print out the blueprints and note where you might want to place cameras. When you are done, check out each location to make sure it is not blocked by anything and provides the best view possible. You may want cameras for:
Front and back doors.
Off-Street Windows
Large common spaces
Driveways
Porches
Stairways
Buy the right package to suit your needs. You can buy each piece individually, but it is generally cheaper and easier to buy bundled Lorex security cameras Miami Beach Coral Gables. At a minimum, your system should have 1-3 cameras, a DVR (digital video recorder), appropriate wiring (Siamese and BNC cables), and power cords.
Unless you are choosing to monitor a large area, wireless cameras with wall mounting should cover your needs. Basic Home Security: Get a package with 2-3 outdoor cameras (to monitor doors), and a DVR with at least 3 days of recording time.
Monitoring Valuables/Young Children: 1-3 indoor wireless cameras can cover a small room effectively and stream the footage right to your computer. Alternatively, buy your cameras individually. Once you know how many cameras you need, you’ll need to think about what specific cameras you want.
A home surveillance system can cost anywhere from a few hundred dollars to well over a thousand, so make sure you consider the type of cameras you need before buying the features below should be clearly labeled on the box. While you can buy all of the parts separately, buying a full “surveillance set” is usually cheaper and easier to install.
Wireless vs. Wired: Wireless cameras are easy to set-up without drilling or running cables through your house, but the quality can be sub-par the further they get away from the receiver. If you are covering a big area, go wired, but most houses find wireless and easier set-up process.
Indoor or Outdoor: Cameras that are not made to be placed outside will quickly break when exposed to rain and humidity, so be sure to choose accordingly.
Motion Sensing: Some cameras will only record when they notice motion, saving space and energy while only capturing footage when someone is in the room.
Remote Viewing: Many high-end cameras offer the ability to stream their footage to your phone or laptop anywhere in the world, making it possible to check out your house through a provided program or app
Set up a recording device and monitor. In order to store and view your footage, you need a Digital Video Recorder (DVR). This device receives all of the video feeds and broadcasts them onto a monitor, usually a computer screen or small TV. DVRs have a variety of memory capacities that allow them to store a certain amount of video, from hundreds of hours to one day’s worth of footage.
If you buy a complete surveillance set the DVR is usually included with the camera. Network Video Recorders (NVR) and analog recorders (VCRs), also available for purchase, work the same way as a DVR, using an internet signal (NVR) or blank tapes (VCR) to record instead of a digital hard-drive.
The following installation tips will work here as well. Test your equipment before installing. Make sure your cables, DVR, cameras, and monitor all work by connecting each one before you install anything
Installing a Camera
Choose a high, broad angle for your camera. The best angle of any room is usually looking down from the corner where the ceiling meets the walls. Make sure you can clearly see all entries and exits and that the camera is near a power outlet. If you are mounting a camera outside, place it above 10 ft so that it cannot be easily knocked down
Mount your camera to the wall. Some cameras come with sticky pads to adhere your camera to the wall, but screwing your camera in is the safest way to mount your cameras long-term.
While every camera is different, most of them can be mounted the same way:
Place the mount in its desired location.
Using a sharpie, make marks on the wall where each screw should go.
Drill a hole for each screw using an electric drill
Hammer in any molding pins.
Screw the mount into the wall.
Position the camera to your desired angle
Attach your camera to a power source. Almost all cameras come with a power adapter that plugs into a normal wall socket. Plug the small, round end into the power input on the back of the camera and plug the other end into the outlet. If your power adapter is missing or broken, contact your manufacturer.
Attach a wired camera to your DVR. Surveillance equipment is connected using a BNC (Bayonet Neill Councilmen) connection. BNC cables are simple to use they are identical on both sides and you simply plug them into the appropriate port, turning a small nut on the end to lock it in place. Plug one end into your camera’s “Output” and the other into one of the DVR “Input” ports.
Note which input you plug into this is the input your DVR must be set to in order to view your camera’s video. If your cable does not have a BNC connection you can buy a simple BNC adapter online or at a hardware store. This will slip onto the end of your cable to make it BNC compatible
CONTACT US
[email protected] / S
Spy Store Miami & Spy Shop Miami
Miami Beach • Miami Gardens •